Stitch Multiples Explained: How to Read 'Multiple of 4 + 2' in Patterns
A plain-language guide to reading pattern math: what 'multiple of 4 + 2' actually means, how to separate repeat stitches from edge stitches, and how to check your work.
Maggie

A practical method guide for evenly spacing increases and decreases, with transparent arithmetic, worked examples, and when to use a calculator for exact distribution.
To increase or decrease stitches evenly, divide your current stitch count by the number of changes to find your interval, then place one change every interval. When the division isn't clean, you'll have a remainder that must be distributed—usually by adding extra plain stitches between some changes. For exact placement with any numbers, use a calculator after understanding the method below.
Your pattern says: "Increase evenly to 104." You have 92 stitches on your needle. Twelve increases hide inside that small sentence—twelve decisions about where each one goes, spaced so the fabric doesn't pucker or slant. This guide shows you how to think through those decisions, what to do when the math doesn't divide cleanly, and when to hand the exact spacing to a calculator.
Even distribution means spacing your changes at regular intervals across the entire row or round. The interval is the number of plain stitches between changes.
Basic formula:
When this division results in a whole number, placement is straightforward. When it doesn't, you get a remainder—and that remainder is where most mistakes happen.
The numbers:
Calculate the interval: 92 ÷ 12 = 7.666...
This is not a whole number. You cannot place an increase every 7.666 stitches. You must work with whole stitches, which means some intervals will be 7 stitches and some will be 8.
Distribute the remainder:
Those 8 extra stitches get distributed as +1 to 8 of your 12 intervals. So:
Practical placement: Work 8, increase, 8, increase, 8, increase, 8, increase, 7, increase, 7, increase, 7, increase, 7, increase—continuing around until all 12 increases are placed. The order of 7s and 8s can be varied; what matters is that no two increases end up clustered.
The numbers:
Calculate the interval: 104 ÷ 12 = 8.666...
Again, a remainder. Working with whole stitches:
Distribution:
Situation — What It Means — What You Do
No remainder (e.g., 90 ÷ 10 = 9) — Perfect interval — Place change every X stitches exactly
Small remainder (1–3) — Slight unevenness — Add 1 extra stitch to first few intervals
Large remainder (close to divisor) — Many intervals need +1 — Spread extra stitches across many intervals; consider checking your math
Remainder > half the divisor — Re-examine — Some methods prefer alternating; ensure you're not creating visible bias
The key principle: never hide all remainder stitches at one end. That creates a visible bulge or dip. Spread them throughout.
Patterns vary in edge treatment. Three common conventions exist:
No single convention is universal. Check your pattern's context: garment pieces seamed together often use method 2; circular shawls may use method 1; stitch-pattern compatibility may dictate method 3.
Knitting:
Crochet:
For simple numbers, mental math works. For complex garment shaping—multiple sizes, compound curves, or pattern-stitch constraints—exact distribution matters more. TheIncrease / Decrease Evenly Calculatorhandles any stitch counts, returns placement sequences, and accounts for your chosen edge treatment.
If you're resizing a pattern entirely, thePattern Resize Calculatormay also help establish your new target counts before you distribute changes.
Pick a real pattern instruction. Write down your current count, target count, and the difference. Do the division. Note your remainder. Sketch the interval sequence on paper before touching yarn. If the numbers are clean, proceed with confidence. If they're messy, you now understand what the calculator is doing—and why.
A plain-language guide to reading pattern math: what 'multiple of 4 + 2' actually means, how to separate repeat stitches from edge stitches, and how to check your work.
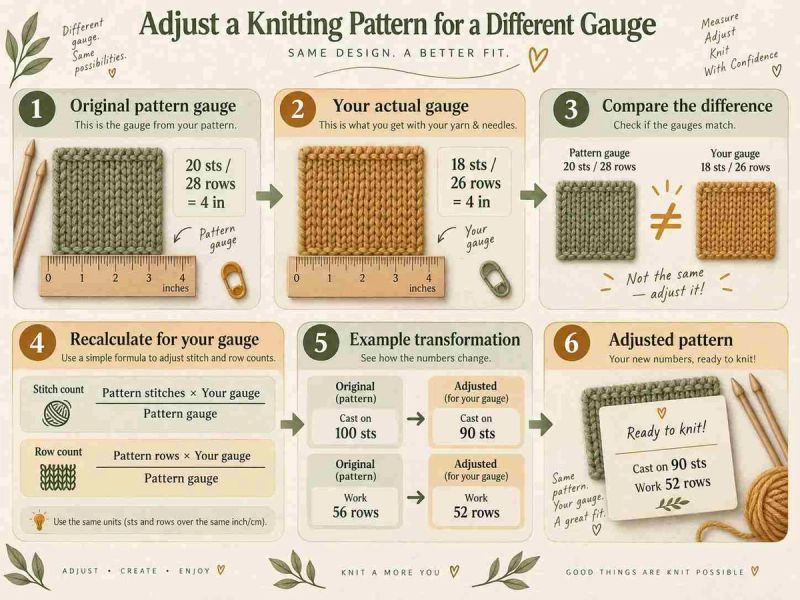
A practical method for resizing knitting patterns when your swatch gauge doesn't match the pattern, including worked examples, repeat constraints, and construction risks.
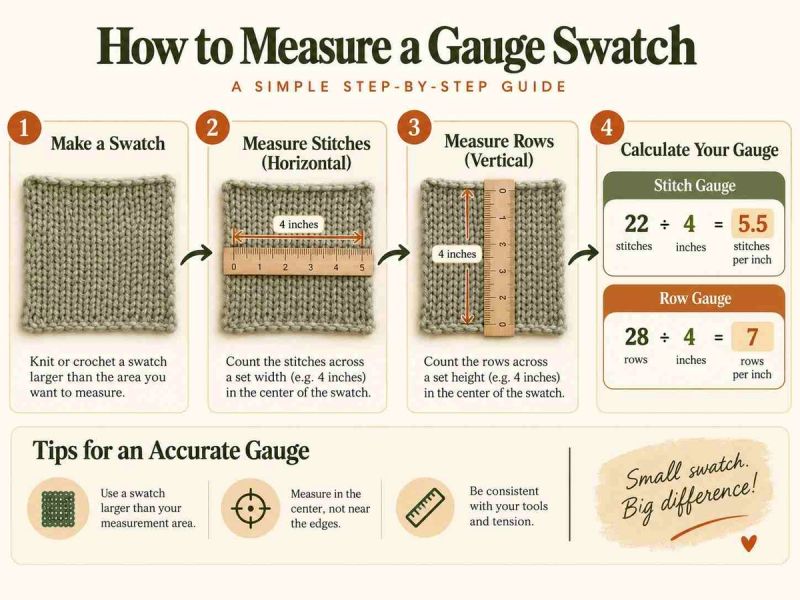
A step-by-step guide to measuring knitting gauge swatches correctly, with worked examples and troubleshooting for common measuring mistakes.
Something look wrong? Report a calculation or content problem.