How to Increase and Decrease Stitches Evenly in Knitting and Crochet
A practical method guide for evenly spacing increases and decreases, with transparent arithmetic, worked examples, and when to use a calculator for exact distribution.
Maggie

A step-by-step guide to measuring knitting gauge swatches correctly, with worked examples and troubleshooting for common measuring mistakes.
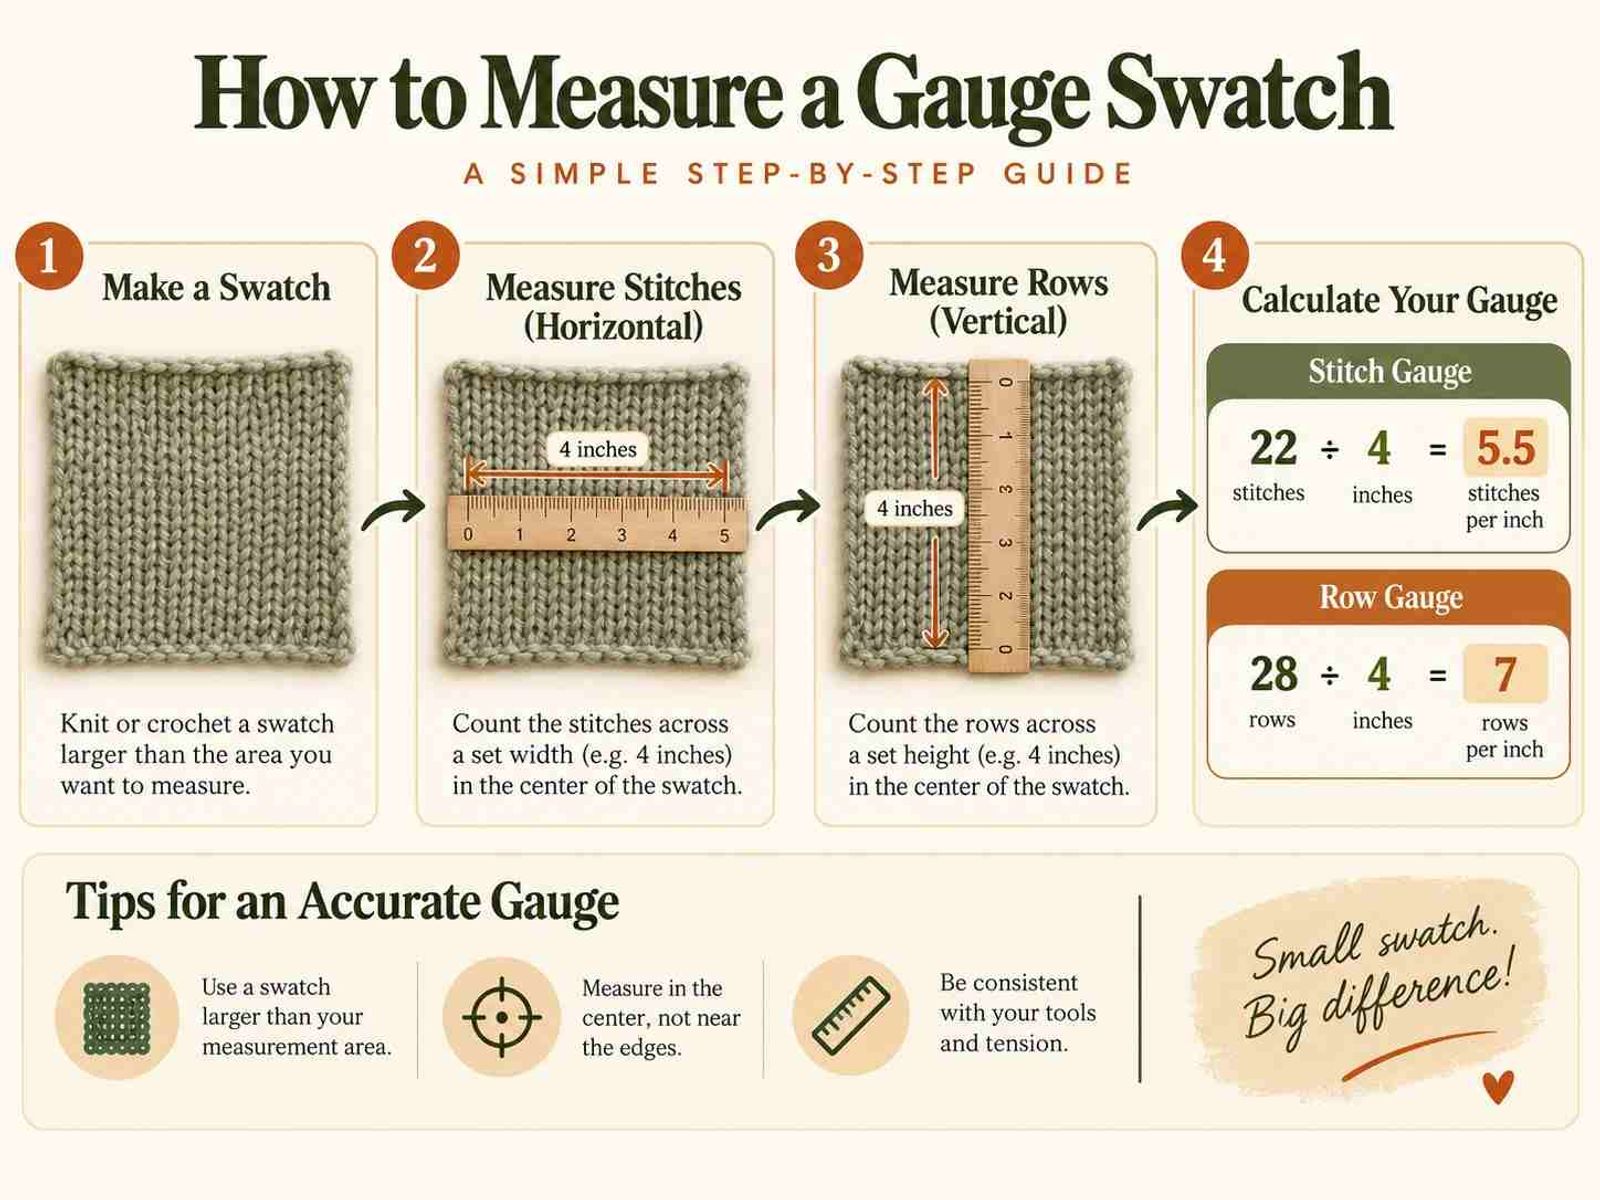
Measure your gauge swatch after blocking, using a flat ruler placed at least one inch from any edge. Count full stitches and rows across a 4-inch (10 cm) center section, not at the edges where tension distorts. If your pattern specifies gauge over 4 inches, measure 4 inches and divide by 4 for stitches or rows per inch—do not measure a single inch and multiply.
You finished the sweater body. The stitches looked even on the needles. But after binding off, the piece is two inches too narrow across the chest. The likely cause: the swatch was measured too close to the edge, or measured before blocking, or counted from a too-small sample that hid how the fabric would relax. Gauge measurement is where generous effort turns into accurate fabric. This guide shows a repeatable process for measuring a swatch so your numbers mean something.
Block your swatch the way you will block the finished piece. Lay it flat without stretching. Place a ruler at least one inch from any edge, mark a 4-inch section in the center, and count the full stitches and rows within that span. Divide by 4 for stitches or rows per inch. Compare to pattern gauge. Adjust needle size and re-swatch if needed.
A small swatch—two inches square—does not give reliable numbers. Edge distortion takes up proportionally more space, and the center fabric has not settled into its final character. The Craft Yarn Council recommends a swatch at least 4 inches (10 cm) square, with 6–8 inches preferred for greater accuracy. Larger swatches also let you measure multiple locations and average the results.
Swatch Size — Usable for Gauge? — Why
2″ × 2″ — Poor — Edge effects dominate; blocking behavior hidden
4″ × 4″ — Minimum acceptable — Standard reference size; still check multiple spots
6″ × 6″ or larger — Preferred — Center measurement zone clear; averages local variation
Cast on enough stitches for at least 6 inches of fabric width in your chosen pattern stitch. Work for at least 6 inches vertically. Include a garter or seed-stitch border if you want to prevent curling, but do not measure within one inch of that border. The border exists to keep the swatch flat; it is not part of your gauge measurement.
Work the swatch in the exact stitch pattern named in the pattern's gauge specification. "Stockinette gauge" and "pattern stitch gauge" are not interchangeable. Cables, lace, and colorwork all compress or expand fabric differently.
Block the swatch. Always. The only exception is if you genuinely never intend to block the finished item—and even then, washing and drying will change most yarns.
Blocking methods vary by fiber:
Measure only after the swatch is fully dry. Measuring damp yarn gives false numbers that will shift again.
Edges lie. The first and last stitches of a row are distorted by selvedge tension, and the cast-on and bind-off rows behave differently from the fabric body. Measure in the center zone, at least one inch from all edges.
For a 6″ × 6″ swatch, your safe measurement zone is the central 4″ × 4″ area. Mark it with pins if needed.
Place a flat ruler horizontally across a single row, inside the safe zone. Align the zero mark with the left edge of one stitch. Look for the "V" shapes of stockinette; each V is one stitch. Count the full Vs across exactly 4 inches. Do not estimate partial stitches at the end of your 4-inch span—move your ruler to start and end on complete stitches.
Example: You count 19 full stitches in 4 inches.
19 stitches ÷ 4 inches = 4.75 stitches per inch
If your pattern calls for 20 stitches per 4 inches (5 stitches per inch), your fabric is too loose. Go down a needle size and re-swatch.
Rotate your ruler vertically. Align with the bottom of one row of Vs. Count complete rows across 4 inches. Row gauge matters for vertical shaping, armhole depth, and overall length.
Example: You count 24 rows in 4 inches.
24 rows ÷ 4 inches = 6 rows per inch
Measure in at least two locations on the swatch—upper center and lower center, or left and right of true center. Average the results if they differ slightly. If they differ by more than half a stitch or row per 4 inches, your tension is inconsistent or your swatch is too small. Knit a larger swatch and practice maintaining even tension.
Pattern specifies: 18 stitches and 24 rows = 4″ in stockinette on US 8 (5.0 mm) needles.
Your blocked swatch on US 8: 17 stitches and 22 rows in 4″.
Stitch gauge: 17 ÷ 4 = 4.25 stitches per inch (pattern wants 4.5). Your fabric is too loose. Row gauge: 22 ÷ 4 = 5.5 rows per inch (pattern wants 6). Also loose.
You try US 7 (4.5 mm). New blocked swatch: 19 stitches and 25 rows in 4″.
Stitch gauge: 19 ÷ 4 = 4.75 stitches per inch. Now too dense.
You try US 7.5 (4.5 mm/4.75 mm depending on available sizes) or adjust your tension. Or you accept that this yarn-needle combination does not match and use theGauge Calculatorto recalculate pattern dimensions.
It is common to match stitch gauge but not row gauge, or vice versa. Patterns are usually written to stitch gauge; row gauge is secondary because you can work to length measurements instead of row counts. However, for shaped elements like armholes or raglans, row gauge affects the angle of decreases.
Options when gauge splits:
Problem — Likely Cause — Fix
Gauge changes after first wash — Measured before blocking — Always block before measuring
Different counts at top vs. bottom of swatch — Tension changed during knitting; swatch too small — Knit larger swatch; practice consistent tension
Cannot see stitch definition — Dark yarn, fuzzy fiber, or poor light — Use good light, a contrasting background, or a knit-checker tool
Ruler slips between stitches — Measuring into fabric texture — Use a rigid ruler, not a tape measure; place flat on surface
Half-stitch discrepancy — Counted edge stitches or estimated partials — Move ruler to start/end on full stitches only
Swatch curls, won't lie flat — Stockinette without border or insufficient blocking — Add small garter border; block more thoroughly
Once you have reliable blocked gauge numbers, the math of applying them to your pattern belongs to theGauge Calculator. Enter your measured stitches and rows per 4 inches, the pattern's specified gauge, and your target dimensions to see adjusted cast-on counts and lengths. The calculator handles the arithmetic; this guide ensures the numbers you feed it are real.
Block your current swatch if it is waiting. Measure it using the center-zone, 4-inch method above. Write down stitches and rows per 4 inches, then check against your pattern. If the numbers diverge, decide: adjust needles, adjust pattern with the calculator, or accept the difference and plan for it.
A practical method guide for evenly spacing increases and decreases, with transparent arithmetic, worked examples, and when to use a calculator for exact distribution.
A plain-language guide to reading pattern math: what 'multiple of 4 + 2' actually means, how to separate repeat stitches from edge stitches, and how to check your work.
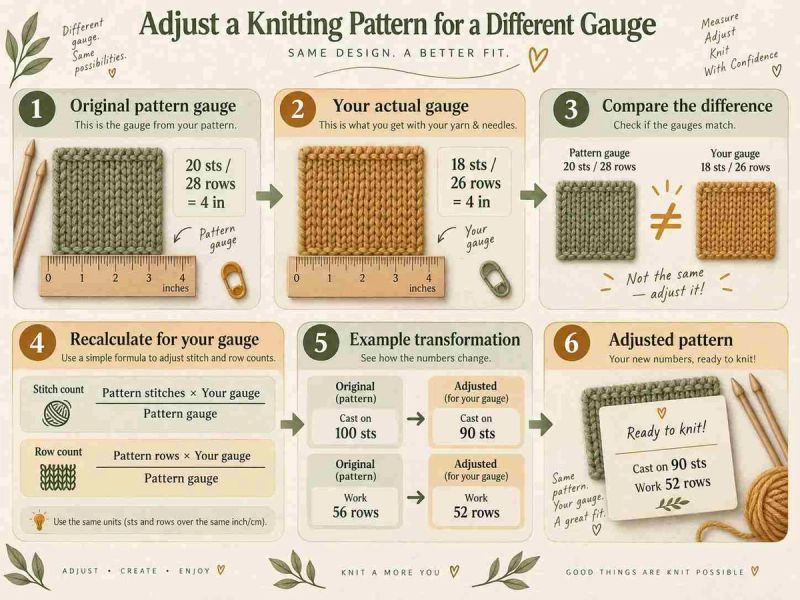
A practical method for resizing knitting patterns when your swatch gauge doesn't match the pattern, including worked examples, repeat constraints, and construction risks.
Something look wrong? Report a calculation or content problem.